Acoustic
Bridge Replacement
|
|
|
|
|
|
|
|
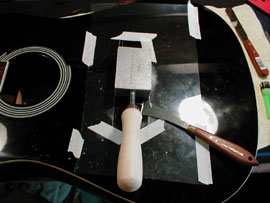
1.
This customer's bridge was
coming off the top of the guitar and was cracked. I talked him into
replacing the bridge instead of repairing the old one. So I heated
up my bridge iron and got out my spatulas and went to work. The key
is to work slowly and let the heat loosen up the glue. This one came
off without too much trouble.
|
|
|
|
|
|
|
|
|
|
|
|
|
|

|
2.
Once
the bridge was removed, I carefully scraped off all excess glue
and sanded the "footprint" of the bridge to clean it
up for new glue. Easy enough, but when I
placed the replacement bridge over the area and noticed that the
old bridge had a larger footprint than the oversized replacement
bridge. So, the only solution was that I would have to make a
bridge by hand to fit the old footprint. |
|
|
|
|
|
|
|
|
|
|
|
|
|
|
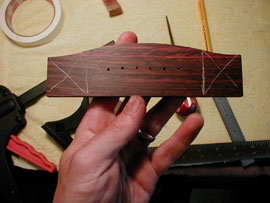
3. No
Problem! I
got a nice piece of rosewood and went to work. I traced the outline
of the old bridge onto my piece of rosewood and then enlarged
it a hair. Then I
cut it to shape and drilled pilot holes for the string holes.
I
marked off the areas that had to be scooped and contoured.
|
|
|
|
|
|
|
|
|
|
|
|
|
|
|
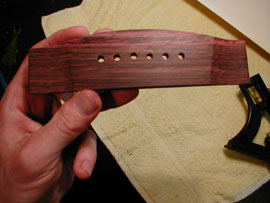
4. I
shaped the bridge using files and sandpaper, making sure to follow
the radius of the original bridge. Then
I drilled the string holes almost to size. I would leave the final
reaming after the bridge was mounted on the guitar. It
turned out nicely. Much better than the cheap bridge that
was on the guitar originally. |
|
|
|
|
|
|
|
|
|
|
|
|
|
|
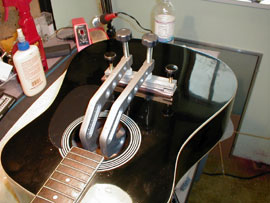
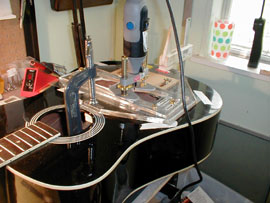
5. Time
to pull out the deep bridge clamps to tightly bond the new bridge to the guitar.
Once the glue had set, it was ready to move onto the final
steps. This baby is almost ready to string up!
|
|
|
|
|
|
|
|
|
|
|
|
|
|
|
6. The
saddle slot still needed to be routed so I got out my saddle slotting
jig from Stew Mac. This is a great jig. I used a Dremel to do
the
routing. With that complete, I
fitted the guitar with a new bone saddle, set it up, and it was better
than new! |
|
|
|
|
|
|
|