Installing P-90s in a Gibson Melody Maker
click images to enlarge |
|
|
|
|
|
|

|
1.
This customer,
Ray Bonneville, was sent to me by Gurf Morlix. Ray is a solo singer/songwriter
who plays in an awesome finger-pickin' style. He uses all sorts
of different tunings, slide, and an amplified board for foot stompin'!
Check out his website in my Clients
section.
|
|
|
|
|
|
|
|
|
|
|
|
|
|

|
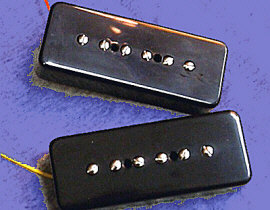
2.
He brought me this beautiful
early 60's Gibson Melody Maker is really nice condition. He wanted
me to install 2 P90 pickups and make a custom pickguard. We decided
to go with
Lindy Fralin
pickups. Good choice. He also wanted stacked concentric pots so
we could stick with 2 knobs and still have 2 volumes and 2 tones. |
|
|
|
|
|
|
|
|
|
|
|
|
|
|
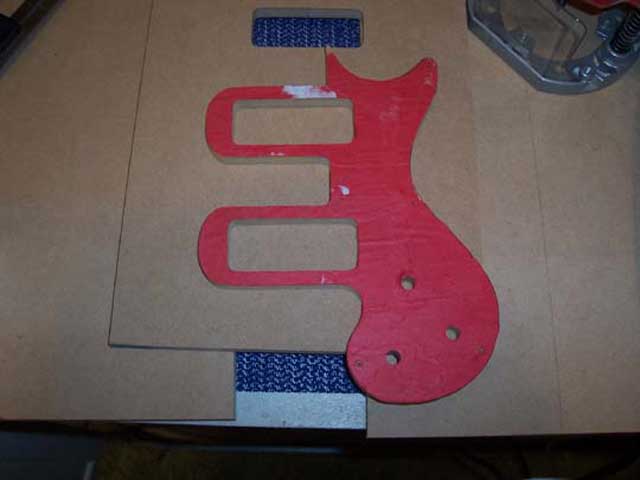
3.
First I had to make a pickguard
template. I made a drawing (on red paper), pasted it to the wood
and then cut it out with a band saw. I cleaned it up with files
and sand paper. Holes were drilled for pickguard screws, controls,
and output jack.
|
|
|
|
|
|
|
|
|
|
|
|
|
|
|
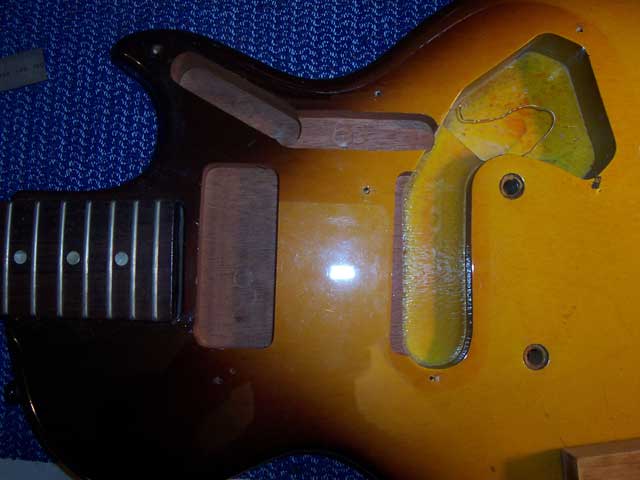
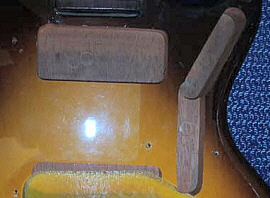
4.
I also used the pickguard
template to rout the pickup cavities on the body. I routed the
neck cavity 11mm deep. Only a little wood had to come out of the
bridge pickup cavity, as it was already routed for the original
pickup. I would have to put some blocks of wood in this cavity
to raise the pickup up as the original cavity was too deep for
P90s. |
|
|
|
|
|
|
|
|
|
|
|
|
|
|
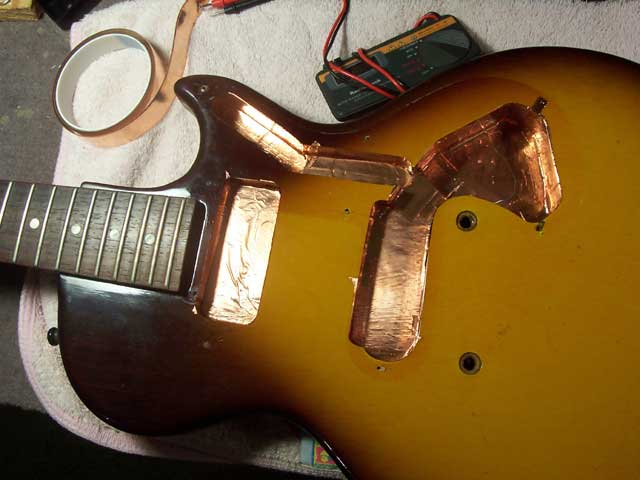
5. I routed a cavity for the
3-way pickup selector switch and a channel for the wires. I drilled
a hole from the neck pickup cavity to the wire channel for the
pickup wire. The original control cavity is just barely deep enough
to accommodate the stacked pots. It's a good thing, I wouldn't
want to go any deeper than it is. Melody Makers are thin guitars.
|
|
|
|
|
|
|
|
|
|
|
|
|
|
|
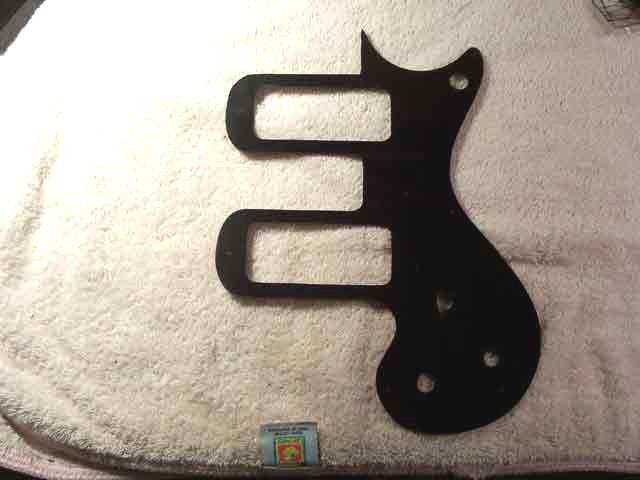
6.
Here is the new pickguard
routed, drilled, and ready to go. I didn't bevel the edges because
the original Melody Maker pickguards are not beveled.
|
|
|
|
|
|
|
|
|
|
|
|
|
|
|
7.
P90 pickups are probably my favorite kind of pickups. They sound
great. But since they are single coil pickups (large single
coils) they have the 60 cycle hum that drives some people nuts.
The severity of the hum changes from venue to venue depending on
flourescent lights, radio waves, the wiring of the building,
etc. Shielding the guitar will help reduce the hum. Of course,
this pickup set included a reverse wind/reverse polarity pickup
so the hum will be cancelled when both pickups are activated.
|
|
|
|
|
|
|
|
|
|
|
|
|
|
|
8.
I shielded all the cavities of this guitar, and the back of the
pickguard, with copper tape. I bought the tape from
Stew-Mac.
The adhesive on the back of the tape is conductive so I don't
have to solder seams. I still check with my multi-meter to make
sure and sometimes do have to solder some seams. I also wrapped
the pickups with the tape.
|
|
|
|
|
|
|
|
|
|
|
|
|
|

|
9.
Next I had to wire it all together. I used a right-angle pickup switch,
shielded wiring, and orange drop capacitors. I used cable ties
to keep the wiring nice and tidy.
|
|
|
|
|
|
|
|
|
|
|
|
|
|
|
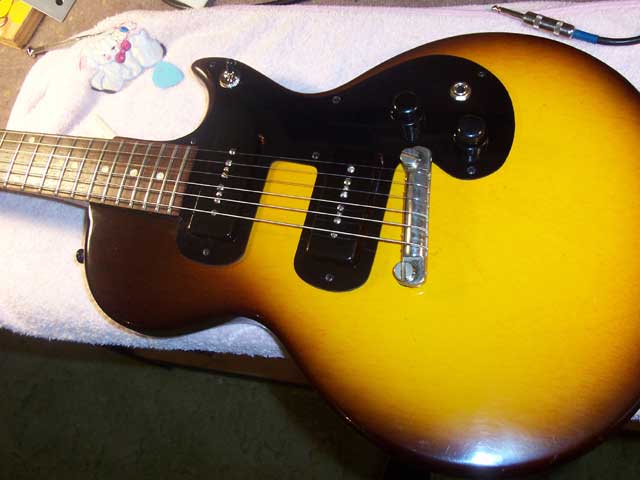
10.
And then I just buttoned her up and
set it up according to the specs I recorded from Ray's other guitars.
He wanted this one set up for open C# tuning.
It sounded awesome! Those pickups sound
so big and round. Lindy is the man!
|
|
|
|
|
|
|
|
|
|
|