|
|
|
|
Intown
Guitar
Repair
is
an
authorized
dealer of... |
|


|
|
|

Silvertone Regal
click images to
enlarge |
|
|
|
|
|
|
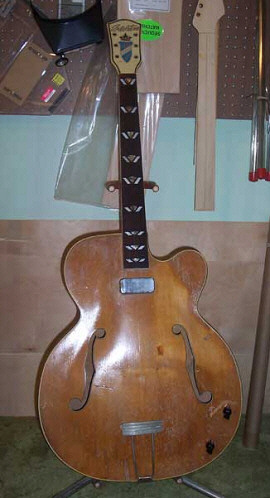
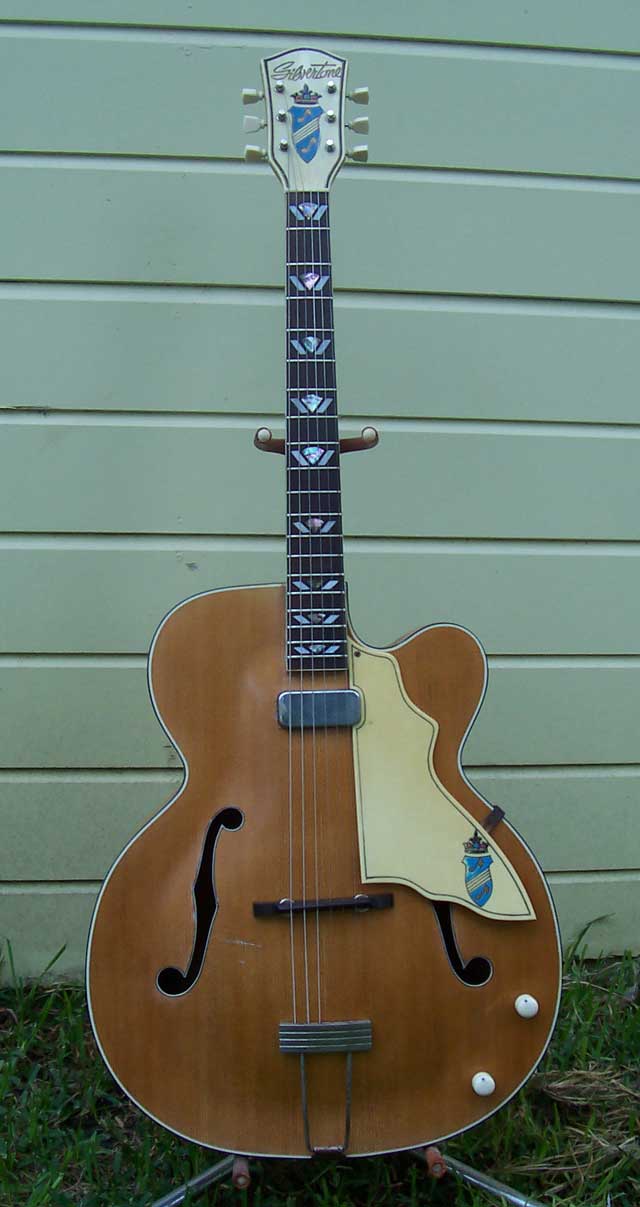
Here we have a cool old Silvertone
Regal. I'm not sure what the year is, but I would guess mid to
late 1950's.
The serial # is B8987 if any of you Silvertone aficionados
want to fill me in.
It's a nice guitar. It features
a spruce top, maple back and sides, maple neck, rosewood fingerboard,
mother of pearl and abalone inlays, and the coolest headstock
face plate of all time. It's true hollowbody and very large-bodied.
Sounds great when just played acoustically.
The customer wanted to sell
it but needed it fixed up a little first. The buttons on the original
tuners had crumbled completely away, the frets were totally worn
out and it was pretty scratched up. We decided to replace the tuners
and non-original volume and tone knobs, replace the output jack, refret it and do some finish work on the top.
Pretty much a full overhaul.
|
|
|
|
|
|
|
|
|
|
|
|
|
|
|
1.
So first, I removed all the
old frets. Then I checked the neck to see how level it was. This
guitar does not have an adjustable truss rod, so if it needed
any bow in the neck I would have to engineer it in the fretboard.
As it turned out, it had just the righ amount of relief so I didn't
need to engineer any. The fretboard did have a good amount of
play wear and needed to be sanded smooth and level.
Sanding really made the inlays come to life. |
|
|
|
|
|
|
|
|
|
|
|
|
|

|
2.
Next I had to cut the new
frets. This neck is bound so I had to cut the tangs to fit in
between the binding. That's why it cost more to refret a bound
neck. It takes more time and effort. You can see in the picture
to the right a fret cut and ready to be hammered in.
|
|
|
|
|
|
|
|
|
|
|
|
|
|

|
3. I cut my frets so that some
of the crown overlaps the binding. Some people cut their frets
to stop at the binding, so that the crown does not overlap. I
can do this on request but it is not my normal way. It takes more
precision and therefore more time. And you lose a little bit of
playing surface which may be an issue if you bend a lot.
|
|
|
|
|
|
|
|
|
|
|
|
|
|
|
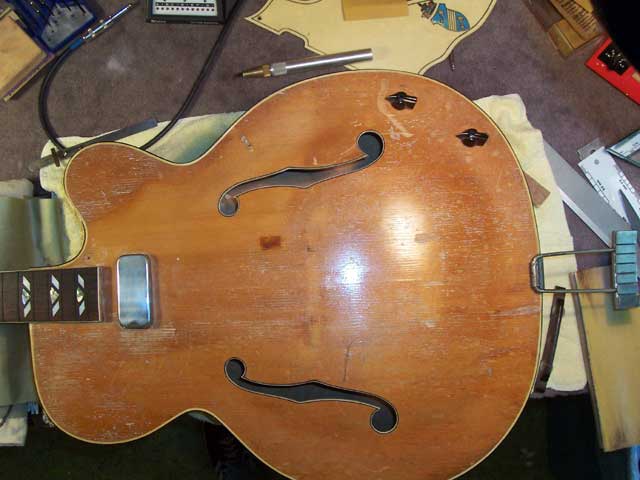
4.
After fretting the guitar
I turned my attention to the top. It was badly scarred with a
few deep gashes and many not-so-deep scratches. Also, there was
some white gunk in almost every crevice. You can see it in the
picture to the right. I think maybe someone had tried to buff
the guitar at one time without sanding the finish down and the
buffing compound was pushed into every crevice and scratch. Or
maybe it was a polish that someone applied to it. Whatever it
was it was ugly.
|
|
|
|
|
|
|
|
|
|
|
|
|
|

|
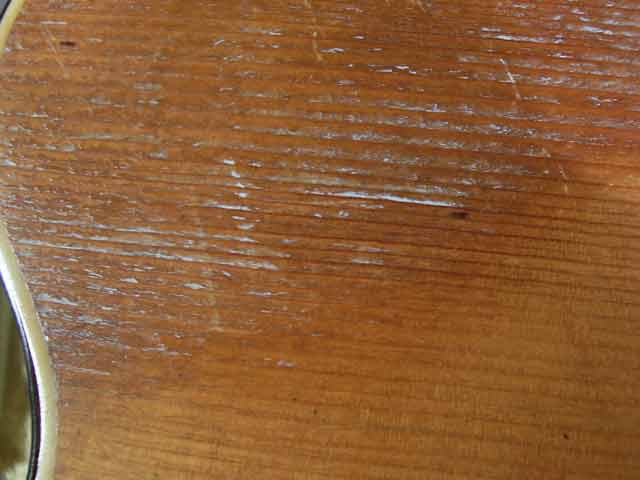
5.
Since I wasn't going to refinish
the entire guitar, my goal was not to make the top look brand
new. I wanted to get rid of the white gunk and make it look clean
but at the same time fit in with the rest of the guitar. Also,
two of the gashes were too deep to sand all the way out so it
wasn't going to look brand new even if I wanted it to.
I sanded the finish off and
gave it a few thin coats of clear lacquer. I didn't want to put
a thick finish on it for two reasons: First, I didn't want to hamper
the tone of the top, and secondly, the thin coat would wear quicker and match
the rest of the guitar. I let it dry thoroughly and
then sanded and buffed to a dull finish. I didn't want it to be
too shiny. I wanted it to look old but clean. And I think I achieved
it.
|
|
|
|
|
|
|
|
|
|
|
|
|
|